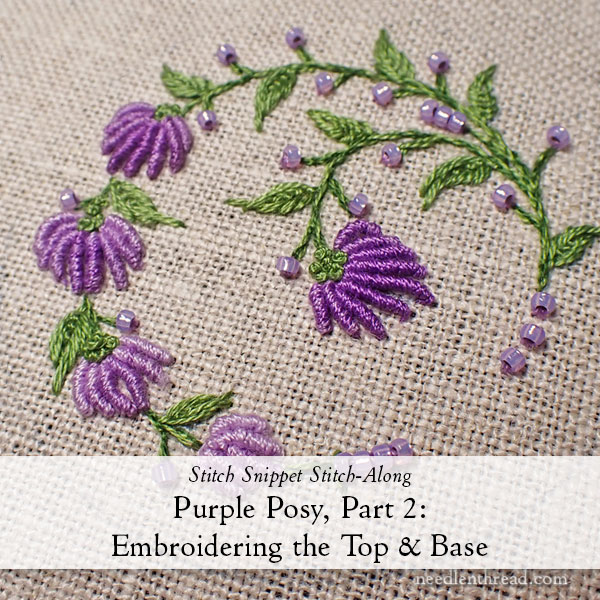
At the moment, we’re going to get occurring the embroidery for Purple Posy. We’ll be embroidering the ornamental high and base of the tape measure cowl.
If you’re simply becoming a member of in, we began this venture final week and you’ll find the primary installment right here.
If you need a supplies package, we nonetheless have a small variety of kits accessible right here.
If you’re a member of the Needle ‘n Thread Neighborhood on Patreon, you have got already acquired all of this data in a handy-dandy PDF format for downloading and printing, so that you’re good to go! Nonetheless, it gained’t damage to learn by means of immediately’s article under, simply in case I mentions one thing or hyperlink to one thing that you simply may discover useful.
Allow us to start to sew…
For embroidering the highest and base of the tape measure cowl, I’m going to make use of the bottom design for example the embroidery course of.
The strategies are precisely the identical for the highest of the quilt (which is the bigger design).
For the embroidery on the stems and leaves, use two shades of inexperienced within the needle without delay: one strand of 3345 and one strand of 3347 within the #7 crewel needle. Within the package, that is the needle with the medium-long eye and the sharp tip.
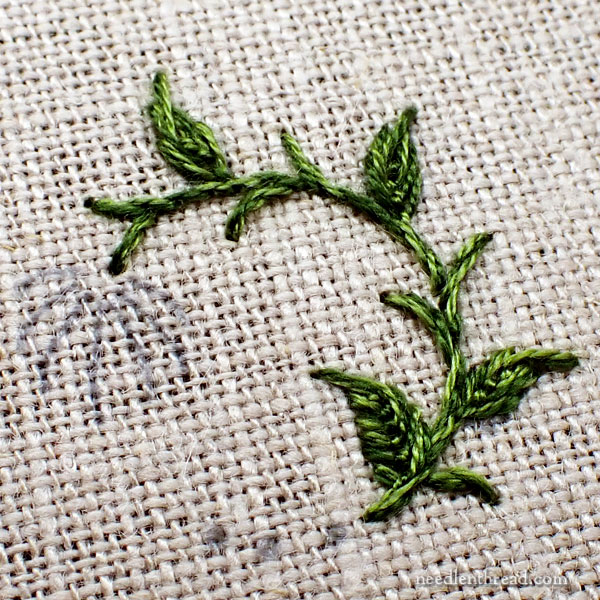
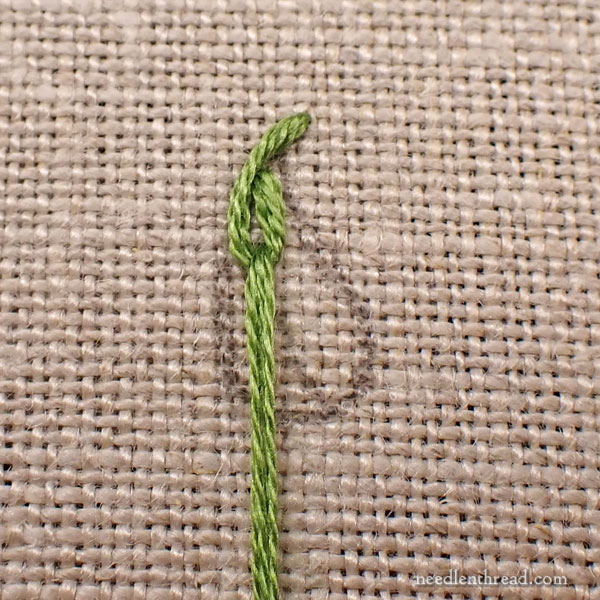
Embroider all of the stems and little straight offshoots in stem sew. Should you’re not acquainted with stem sew, you may discover a video tutorial for stem sew right here.
Try for stitches which might be about 3/16″ lengthy – not as small as 1/8″ however not so long as 1/4″.
Take note of the way you finish the stem sew traces (I cowl this within the stem sew video). The final sew in any stem sew line – if you would like it to return to a pleasant, tight stopping level – must be a really small sew, simply barely past the top of the earlier sew. That method, you don’t have a straggly final sew that stretches out and appears thinner than the remainder of the road. It additionally retains the ensuing “rope” of stem sew good and neat.
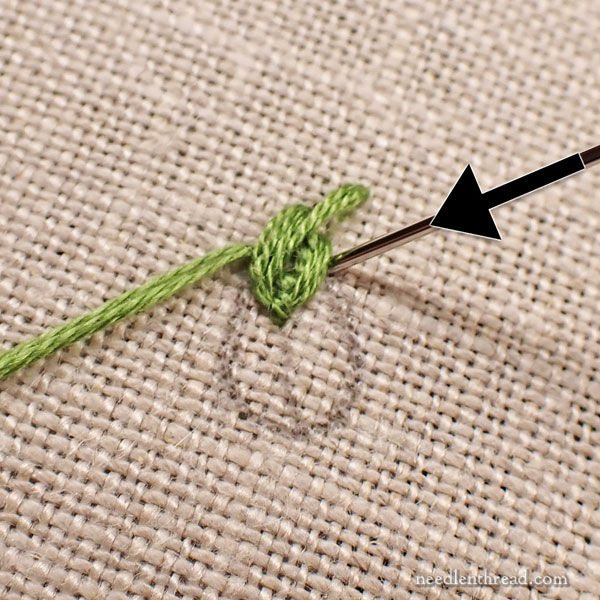
The leaves are labored with the identical floss because the stems. They’re embroidered utilizing a vertical fly sew, however with a curved tip.
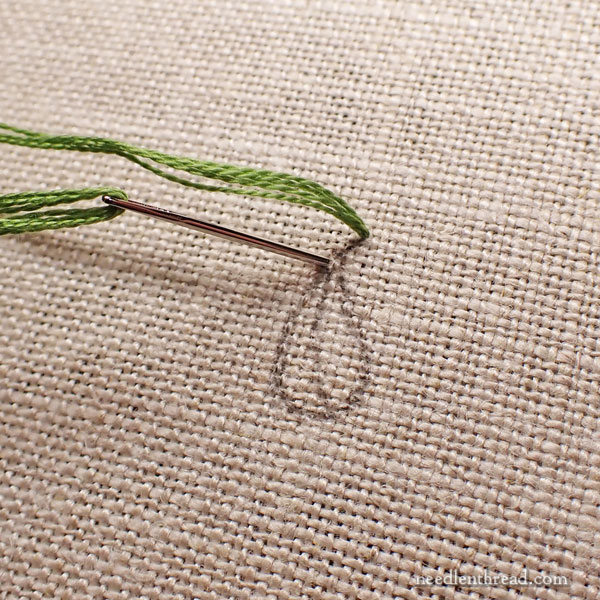
To attain the curved tip, convey the needle and thread to the entrance of the material on the outermost tip of the leaf, after which take it down into the material on the left facet of the leaf define, as proven within the photograph above.
Pull the working thread by means of, however depart a small loop on the entrance of the material. Carry the needle up in the midst of the leaf, the place you think about the middle vein of the leaf to run (and about 1/3 the way in which down the leaf from the tip). Come up contained in the loop, so to catch the loop within the typical method of a fly sew.
Should you’re not acquainted with fly sew, you’ll discover a tutorial for fly sew labored vertically right here.
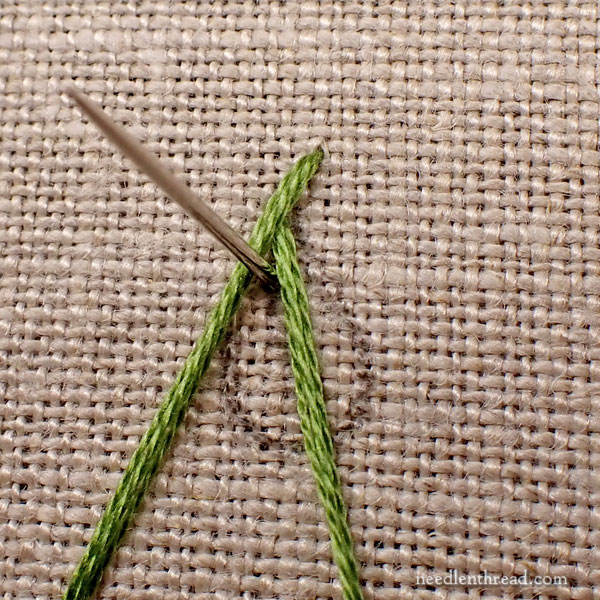
You possibly can see right here the fly sew, able to be anchored on the within of the leaf.
NOTE: you should utilize a pencil (I usually use a mechanical one) to attract a middle vein line down the center of your leaf, in the event you want one to information you as you sew the leaf.
Fill the leaf with fly sew, ensuring that the start and finish of the stitches (the “arms” of the fly sew) observe the form of the leaf’s define.

It is a completed curved fly sew leaf. On the venture, your leaves is not going to be this huge, nor will they’ve this many stitches in them.
When you’ve reached the bottom of the leaf with the fly sew, in the event you nonetheless must fill in a bit on the perimeters of the bottom, simply work a straight sew parallel to the arms of the fly stitches.
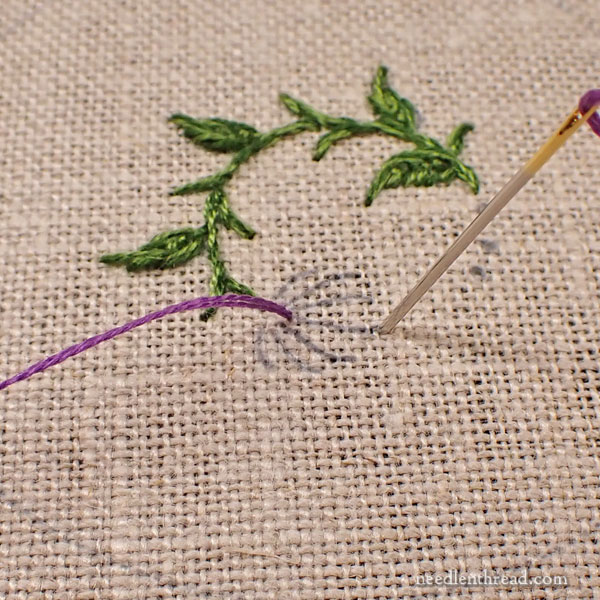
With the greenery completed, transfer on to the bullion knot.
On the design for the bottom, use two strands of darkish purple for all of the bullions, and use the milliner needle to work the bullions. When you’ve got the package, the milliner needle is the needle with the longest shaft and the spherical eye.
If you’re not acquainted with the bullion knot, please watch this video tutorial for bullion knots. That is the strategy I exploit for bullions, and the photographs of the method under present completely different steps in that technique. However you’ll want to observe the video to get the entire technique clearly down.
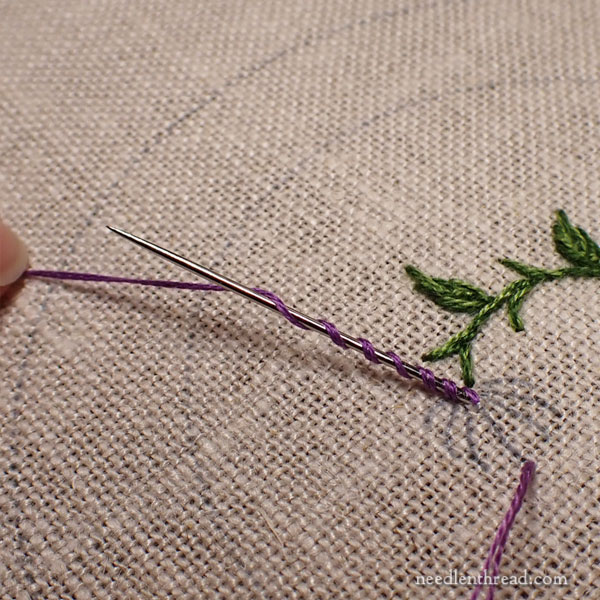
Wrap the thread about 15 instances across the needle at first. You possibly can pivot the needle from the attention that will help you wrap, or simply wrap the threads.
I often wrap counterclockwise with my left hand (my proper is beneath the material), however in the event you’re working with the appropriate hand above, you’ll most likely wrap clockwise. Both method works for this venture.
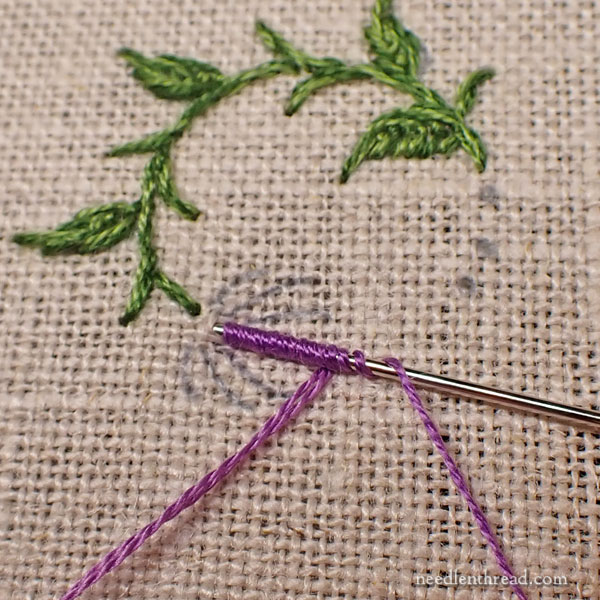
To check to see in case you have sufficient wraps in your needle, make it lie down on the material by bringing the tip all the way down to the material (nonetheless not pulling the needle by means of). Simply manipulate it from the attention, behind the material.
If the wraps cowl the design line, you’re good! If you would like a bit wiggle or arch in your bullion (you’ll see that some are curved), wrap past the size of the design line in order that the bullion bows out a bit.
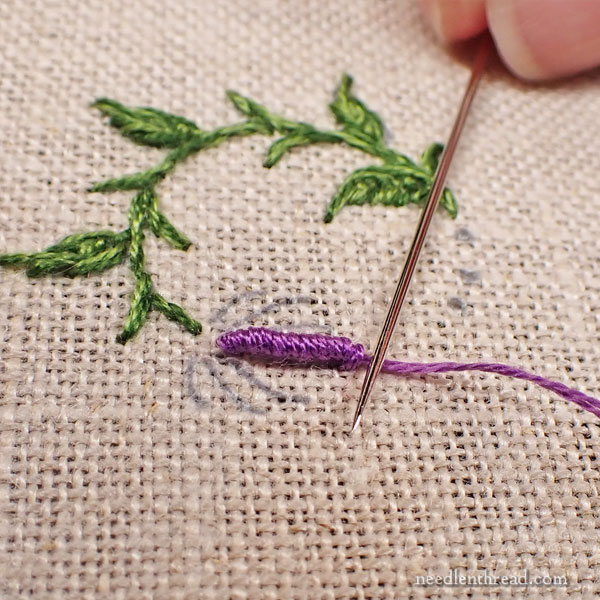
After you’ve pulled the thread by means of (check with the video in the event you haven’t finished this earlier than), use your needle that will help you preserve the wraps in place whilst you rigidity the thread.
You too can use your needle to stroke the underside or high of the bullion, to get it in place. Or you may even roll your finger over the bullion to assist put the wraps so as, if mandatory.
Be aware: You might want to add extra bullions than the sample dictates, to get a fuller flower. That is as much as you. On some flowers, I added one or two further bullions. On different bullions, you may cut back the quantity by one for a greater match within the design space.
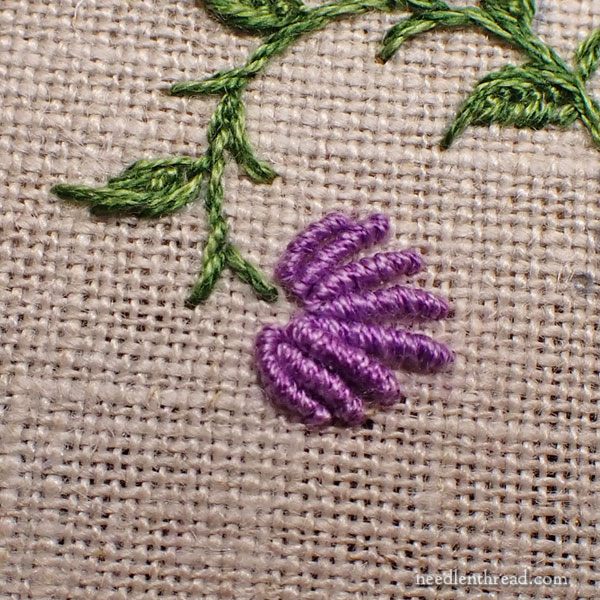
If you wish to, you may lighten the colour of the outermost one or two bullions on both sides, by switching to at least one strand of darkish purple and one strand of medium purple within the needle without delay for these bullions.
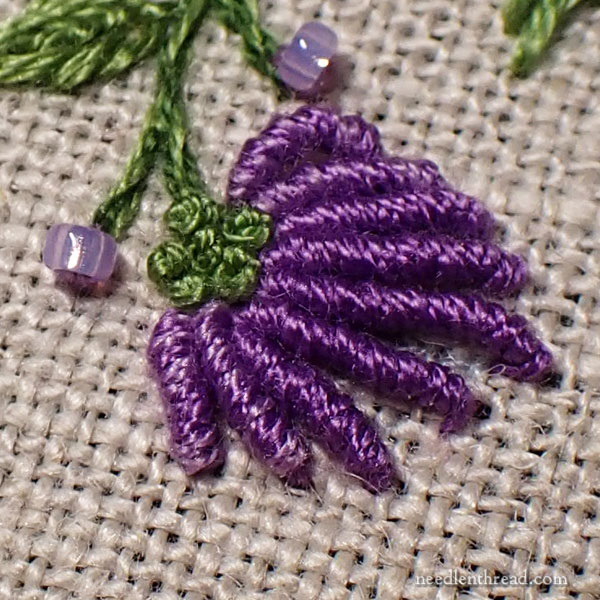
When you have got completed all of the bullions, return to your inexperienced thread (two strands of each within the needle or you should utilize simply two strands of the lighter inexperienced, to lighten it up) and work a cluster of French knots on the base of every bullion flower.
If you’re not acquainted with French knots, you’ll discover a video tutorial for French knots right here.
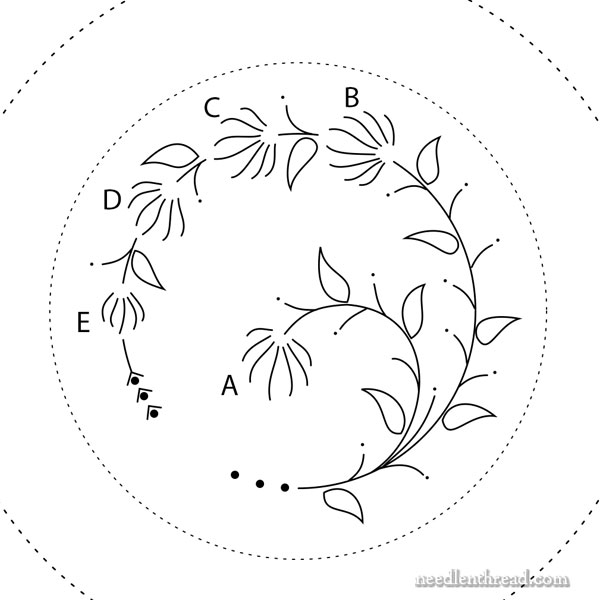
If you embroider the highest of the tape measure cowl, the flowers progress from darkish to gentle, following a particular sequence.
As a result of we’re solely working with three shades of purple, we are going to get a wider vary of shades by combining two colours of floss within the needle without delay.
Consult with the diagram above, and work the shades for every lettered flower in response to the data under:
A: The within bullions on the flower are 2 strands darkish purple; the final two outermost bullions on both sides are 1 strand medium and 1 strand darkish.
B. The within bullions are 1 strand medium, 1 strand darkish; the outermost bullions are 2 strands medium.
C. The within bullions are 2 strands medium; the outermost bullions are 1 strand medium, 1 strand gentle.
D. The within bullions are 1 strand medium, 1 strand gentle. The outermost bullions are 2 strands gentle.
E. All bullions are 2 strands gentle.
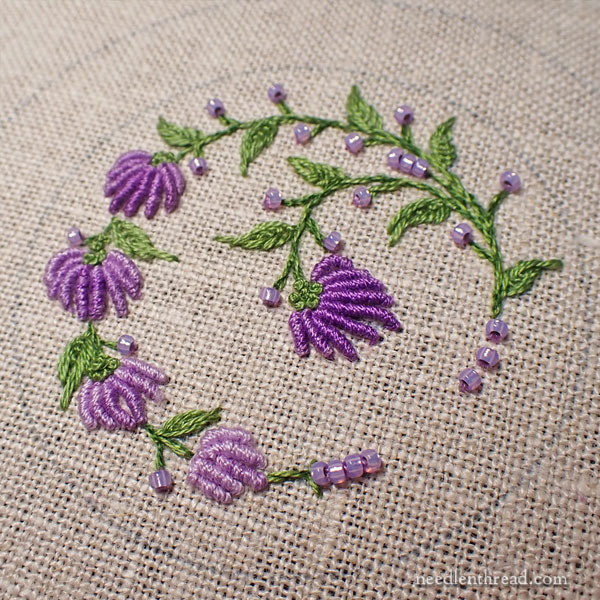
The completed embroidery!
We’ll add the beads and work the ornamental band for the facet of the quilt within the subsequent installment.
Bother With Bullions?
When you’ve got bother along with your bullions and you might be going through the prospect of Bullion Despair and considering giving up, don’t!!
You don’t have to work the flowers as bullion knots. You possibly can work the daisy sew (indifferent chain) within the place of the bullions, fanning out in the identical total form of the flower head.
Observe the identical coloration rules. Inside every daisy sew, work a straight sew in a lighter or darker shade of the purple that you simply used for that daisy sew.
Should you’re unfamiliar with daisy sew (additionally referred to as indifferent chain sew), you may discover a video tutorial for daisy sew right here.
Coming Up
Subsequent week, we are going to work the ornamental facet strip on this venture and we are going to add beads to all of the embroidered components.
I’ve a couple of extra fine details to share with you as nicely. We’ve began a pair (okay, 4, if you wish to get technical) goldwork and silk embroidery tasks right here within the studio this week.
I’ll end up the wool embroidery venture and replicate upon it. I’ll additionally present you some wooly comparisons. And we are going to chat about linen!
Amidst all of that, I’m having nice enjoyable doing taxes (or not – not) and placing collectively one other design e-book that has been a Very Lengthy Time within the works. That’s my night time time work recently, as a result of I actually know methods to have enjoyable at night time, gosh darn it.
Hope you’re having a splendid week!