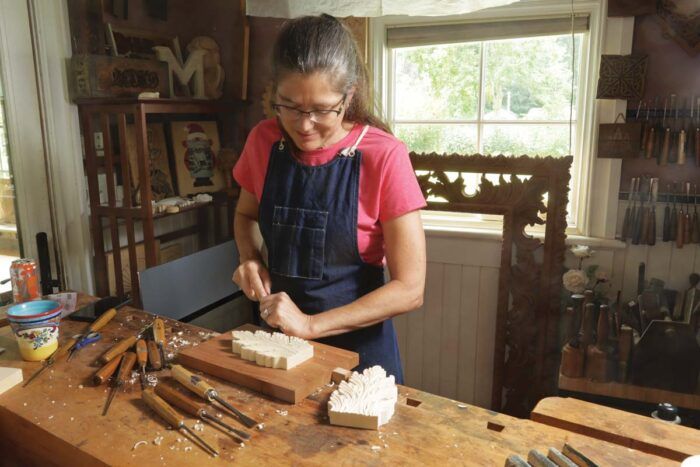
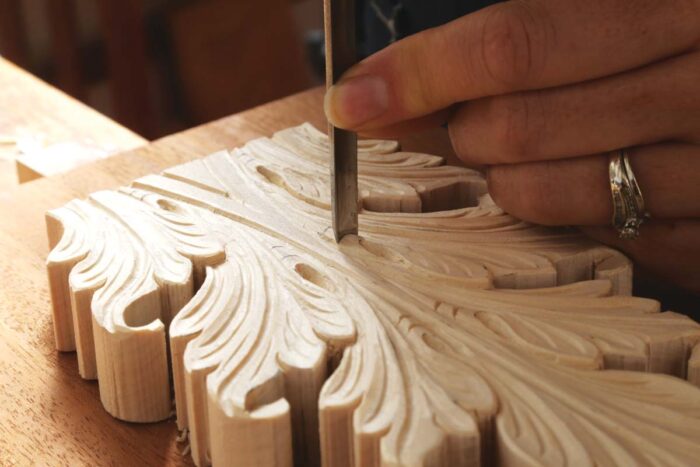
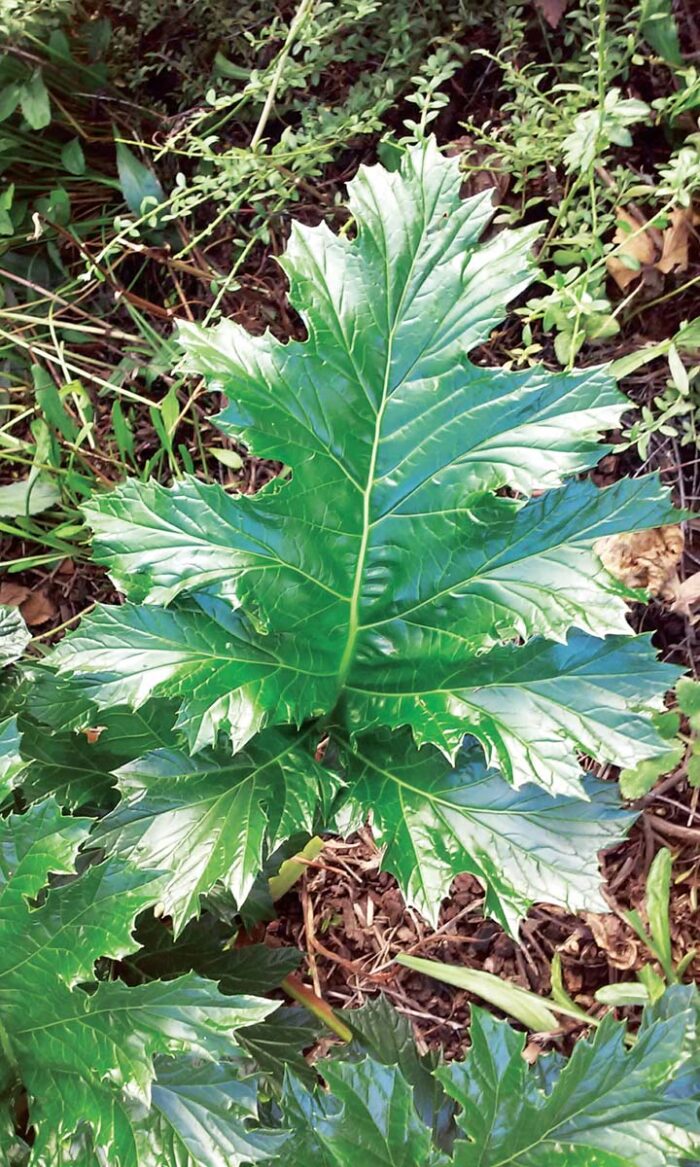
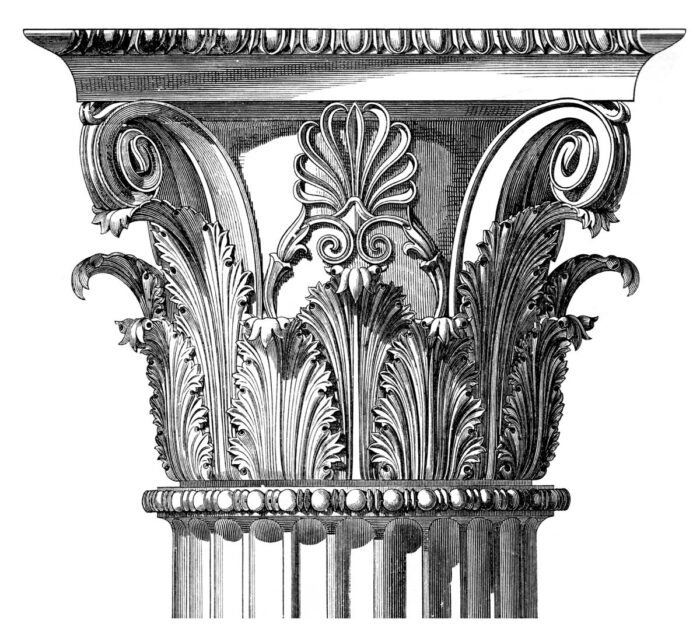
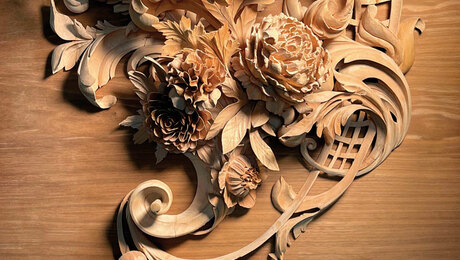
When educating find out how to carve an acanthus leaf, I usually ask my woodcarving college students if they’ve ever seen an acanthus leaf. Often not less than half of them say they’ve by no means even heard the phrase, a lot much less seen the precise plant. I clarify that it’s the leaf that curls in layers round a Corinthian capital, the leaf that repeats alongside the sting of a mirror or image body, and the scrolling, curling leaf generally seen adorning vintage furnishings; they usually uncover that there’s an precise plant behind this widespread design with millennia of historical past.
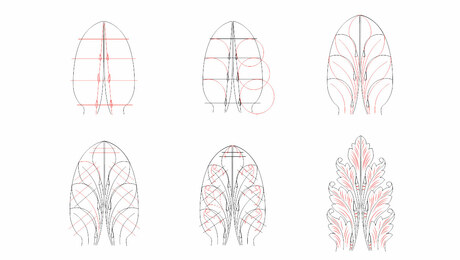
This article’s acanthus sample is your entry level into that historical past. Whereas this particular design is loosely based mostly on the American Rococo bracket on a interval fire in a 1780s house in Charleston, S.C., it’s additionally knowledgeable by numerous different carved acanthus leaves I’ve studied. After drawing totally different variations by the years by merely copying earlier designs, I found a unfastened mathematical strategy. The simplest approach to perceive the main points is to start with a symmetrical leaf, just like the one I carve right here. From there you’ll be able to create extra curling, ornamental leaves in countless variations. Quite a few types have tailored this leaf, and you need to be no totally different.
In case you do adapt your individual, think about whether or not to make use of totally different gouges. I title particular instruments for every step, however different designs, be they greater, extra ornate, or asymmetrical, could require gouges of different sweeps and widths.
Instruments and Supplies
Noticed out the clean
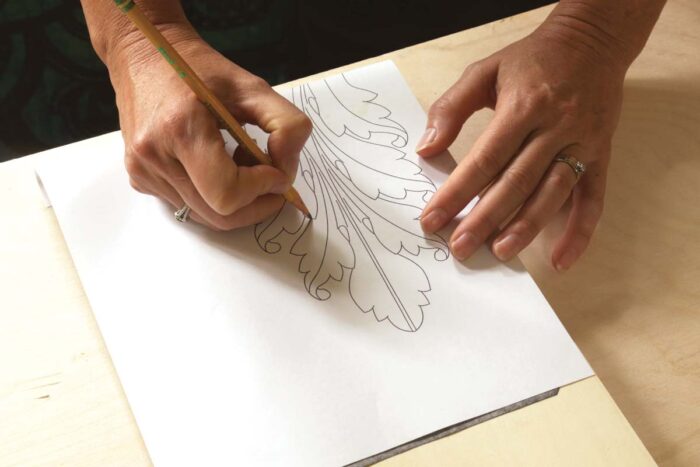
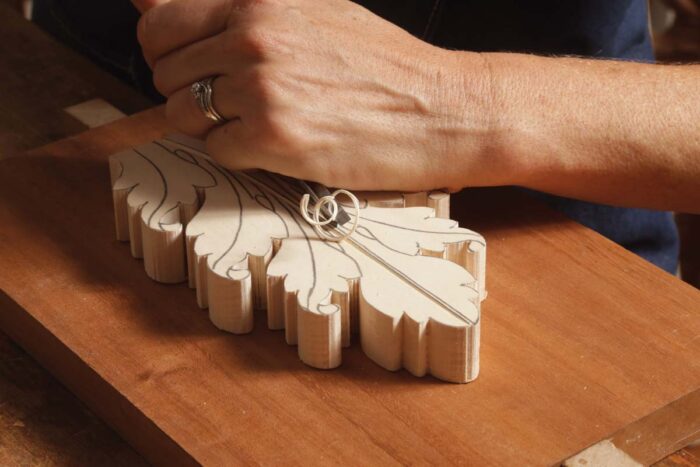
Use carbon or graphite paper to hint the design onto your carving clean. Observe that the tracing has much less element, like veining, than the completed carving. It is because the preliminary carving would take away a lot of these particulars.
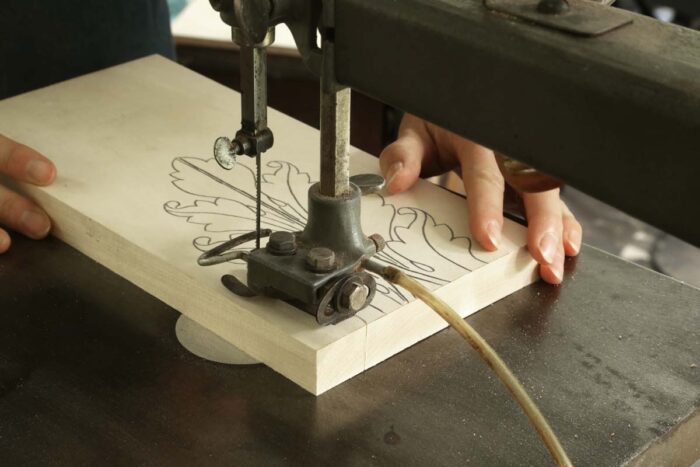
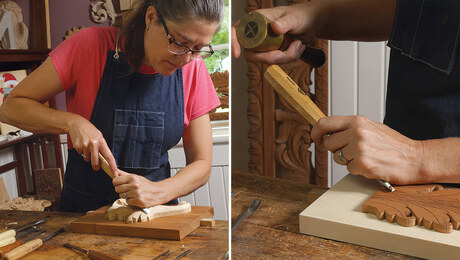
Noticed out the clean. Lower as near the perimeter as doable. You should utilize a bandsaw or fretsaw, however Might prefers a scrollsaw for its mixture of ease and management.
Carve the vein of the acanthus leaf
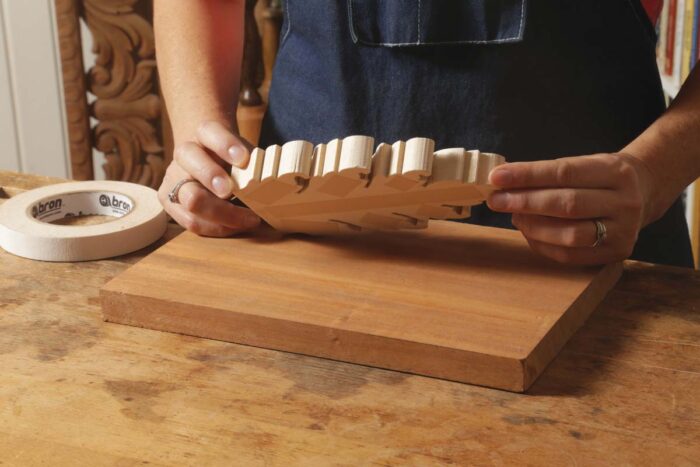
Safe the clean to a backer board with double-sided tape or a paper joint. This allows you to clamp the backer board quite than the carving, supplying you with full, unobstructed entry to the leaf.
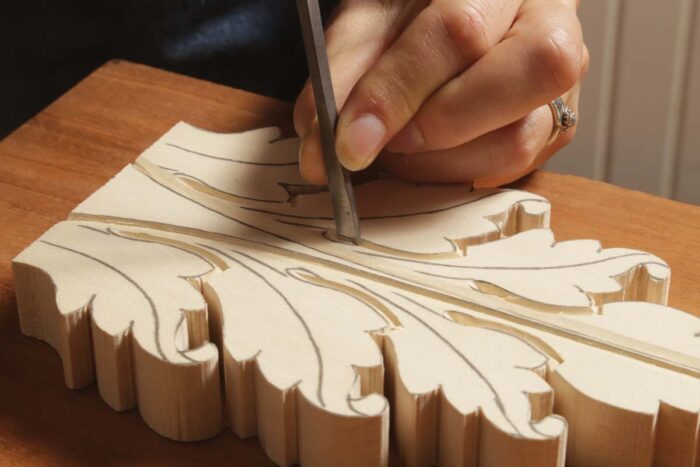
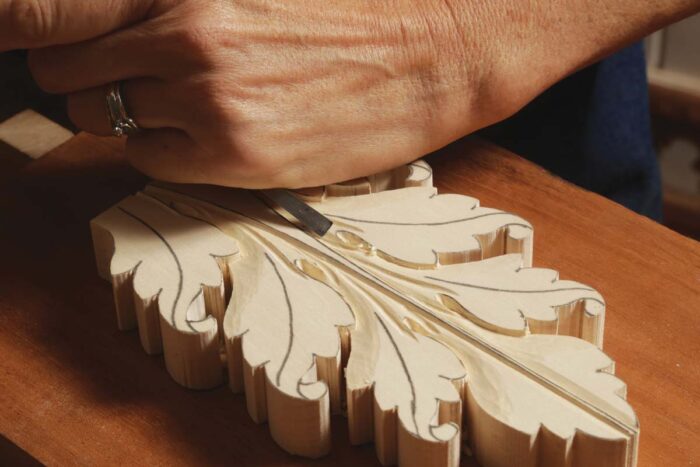
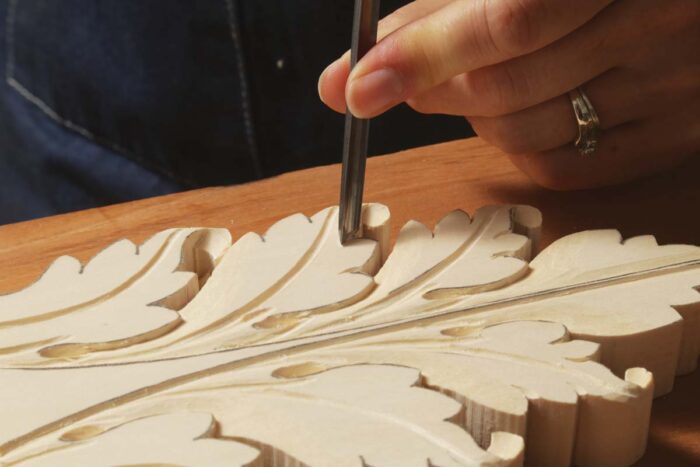
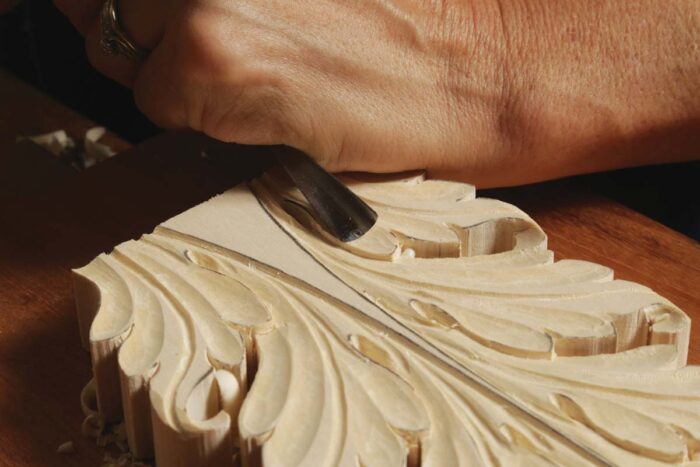
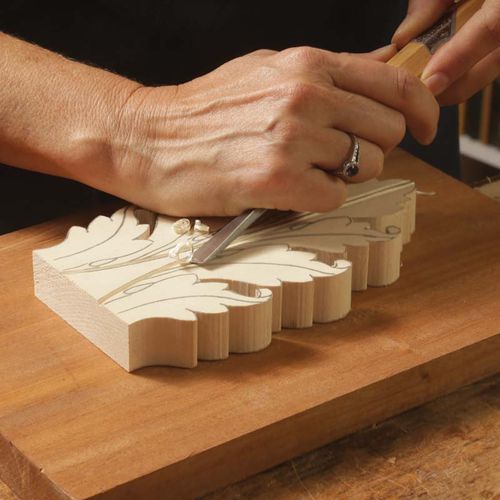
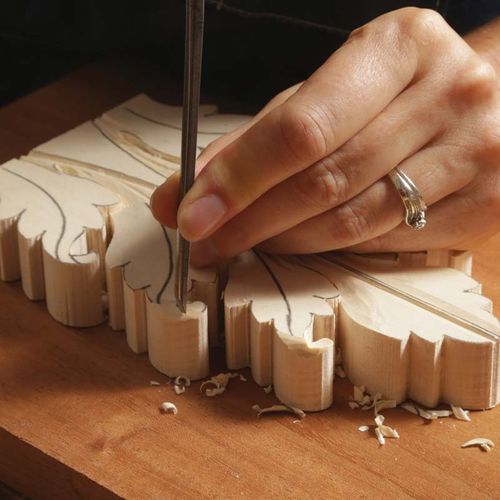
Use a V-tool alongside each side of the center vein. These cuts ought to begin 1⁄16 in. deep however get shallower as they attain the tip of the leaf. Make a number of passes to succeed in the complete depth and guarantee clear, sharp edges.
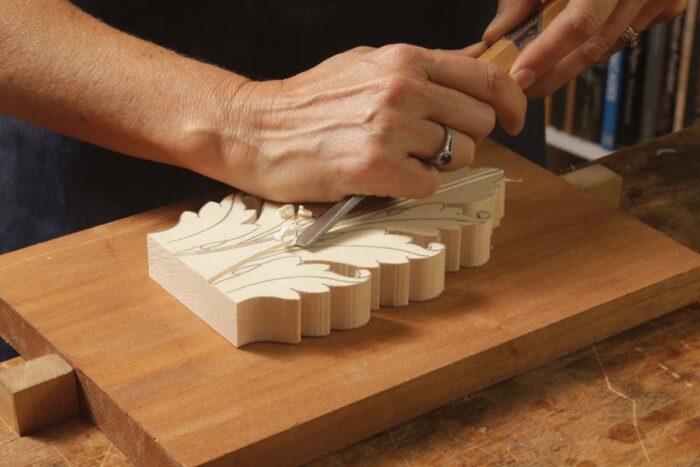
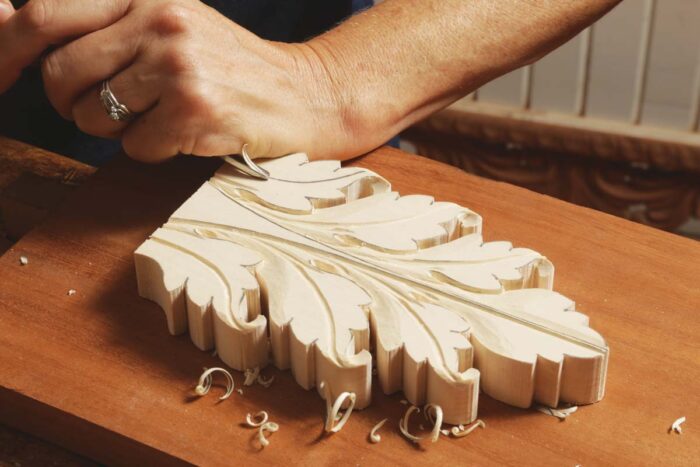
Decrease the leaf close to the center vein. Use a #3–14mm gouge, holding it bevel down whereas gently rounding it away from the vein till about ¼ in. into the leaf. A bench chisel held bevel-down may also work.
Outline secondary lobes and eyes
Use a V-tool the place the secondary lobes overlap. Lower from the middle of the attention and alongside the sting of the overlapping lobe. Be sure to depart the road seen, and that you just lower on the aspect of the decrease lobe.
 |
 |
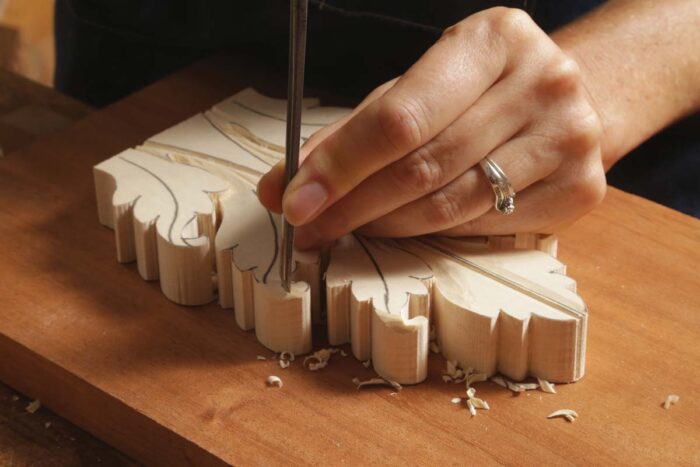
Kind the curved backside of the attention earlier than extending the partitions. Maintain a #11–3mm veiner at 45° for the curved, decrease finish of the attention. Then carve all sides of the attention with a #3– 6mm to finish the teardrop form. These cuts ought to be at a slight angle in order that they meet at a pointy nook.
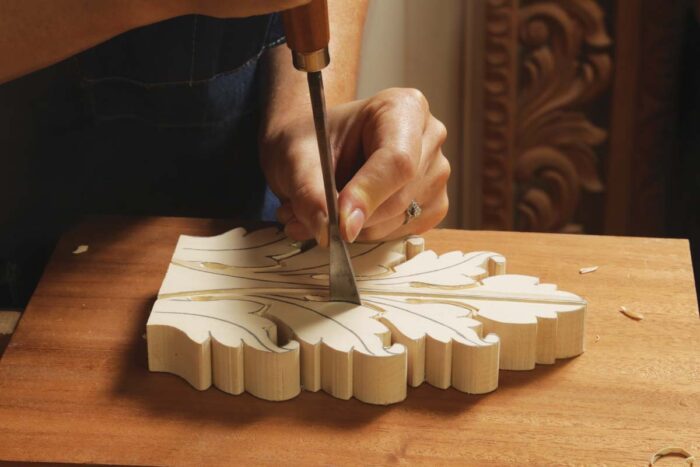
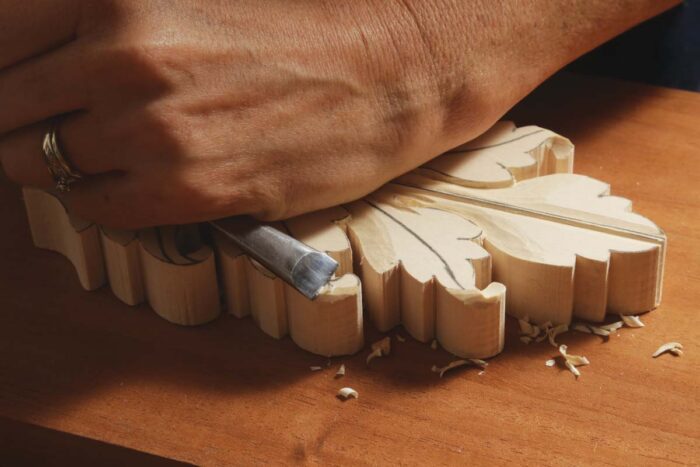
Outline the secondary lobes’ higher edge. Make a vertical lower instantly on the road. Use a #5–14mm for the longer sections and #3–6mm for the smaller sections. These cuts ought to join with the attention’s partitions.
Decrease the lobe. Use a #3–6mm gouge. These cuts create the phantasm that the lobes overlap.
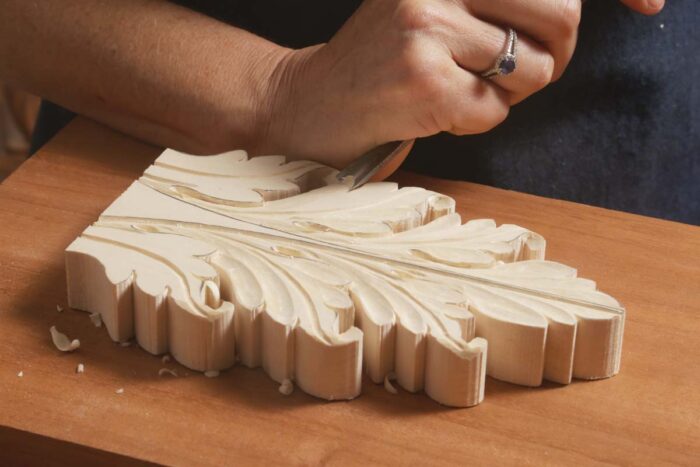
Carve the pipes
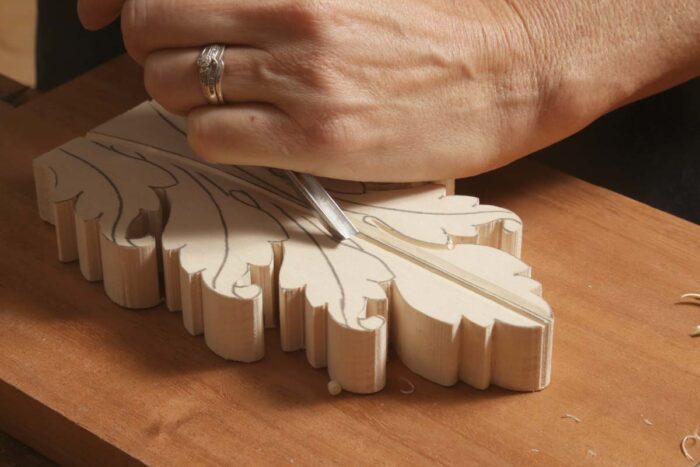
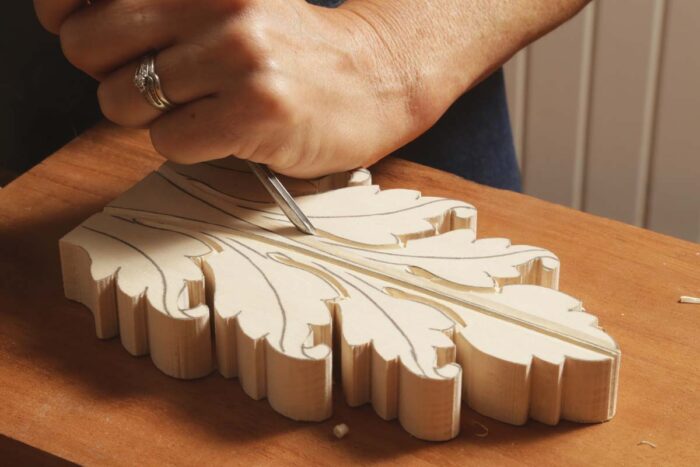
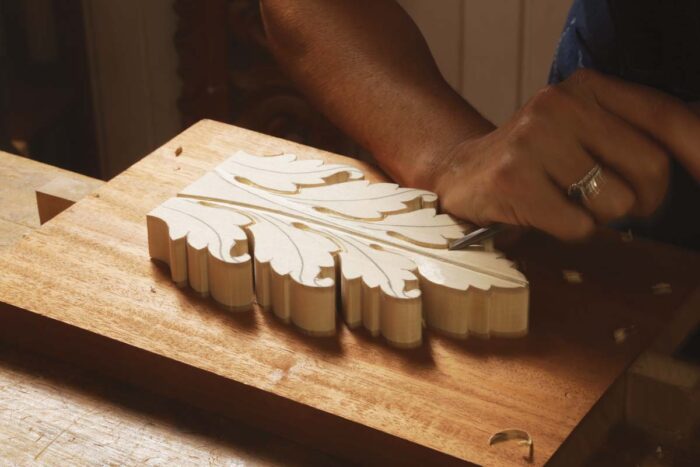
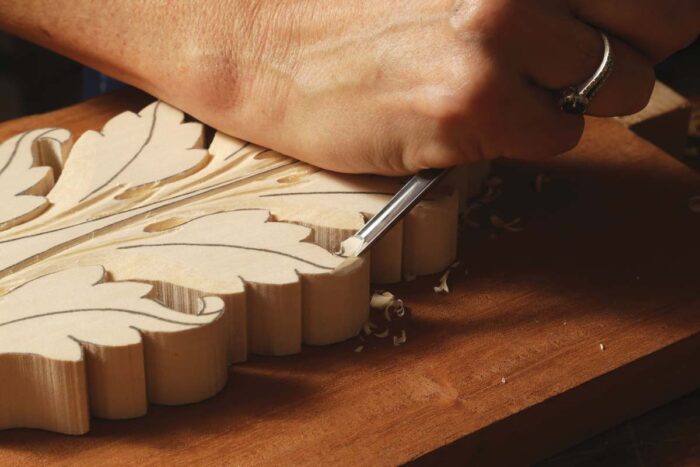
Carve alongside the pipe. With a #11– 3mm gouge, make two sweeping cuts down the leaf to outline the pipe. These cuts ought to begin on both aspect of the attention, and converge as they attain the center vein.
On this design, these cuts additionally lengthen and curve across the eye to start shaping the leaf element. Spherical over any sharp corners with a #3–6mm gouge.
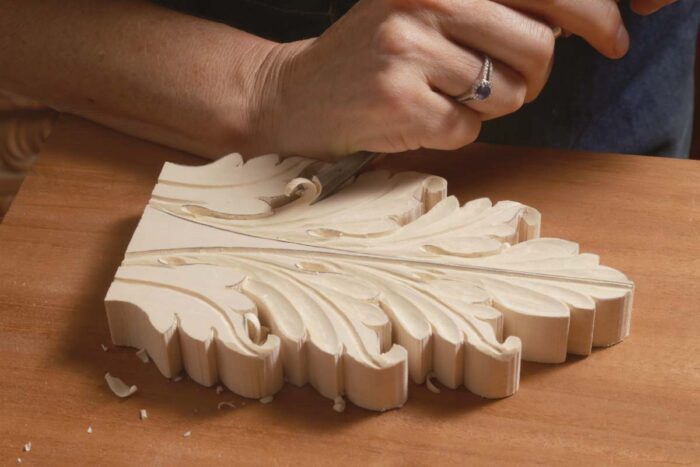
Curl the acanthus leaf ideas
Spherical over the outer edges of the curling leaf. Use a #3–14mm and thoughts the grain path. Take a number of smaller slices to take care of management.
 |
 |
Decrease the leaf. Utilizing a #7–6mm, begin with a vertical cease lower alongside the format line (left). Observe up by angling the gouge 45° and carving towards the cease lower (proper) so the leaf tip appears to be like prefer it’s curling below.
Veins and serrations
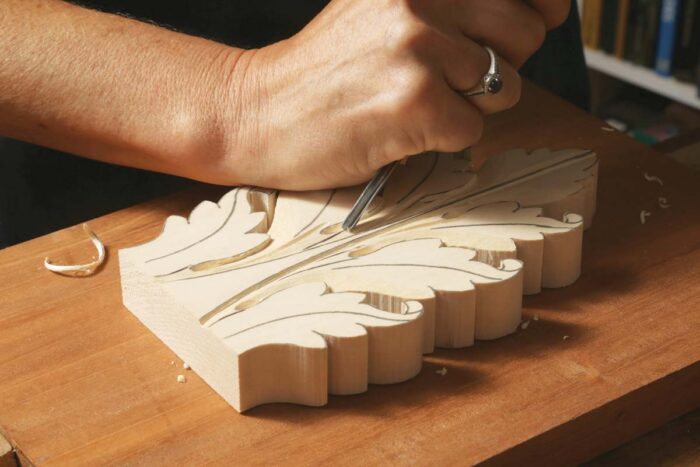
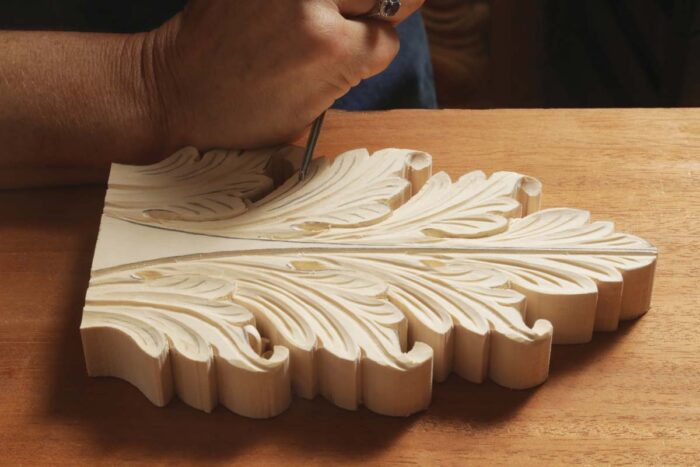
Carve the first lobe’s middle vein. Utilizing a #11–3mm gouge, be certain this line curves in a pure, pleasing S form because it follows the lobe’s personal curl.
 |
 |
Notch the serrations utilizing a thumbnail lower. Carve these serrations with two cuts utilizing a #7– 6mm. Begin with a vertical chop that continues the serration into the leaf, then angle the gouge to take away a small triangular chip. This could give the looks that the lobes barely overlap.
Add depth to the lobes
 |
 |
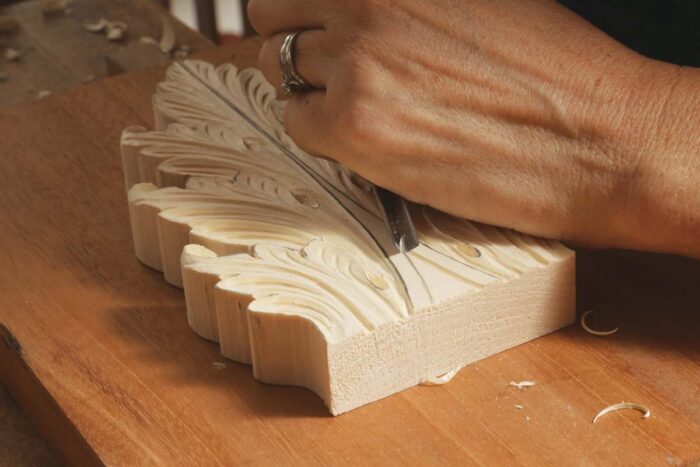
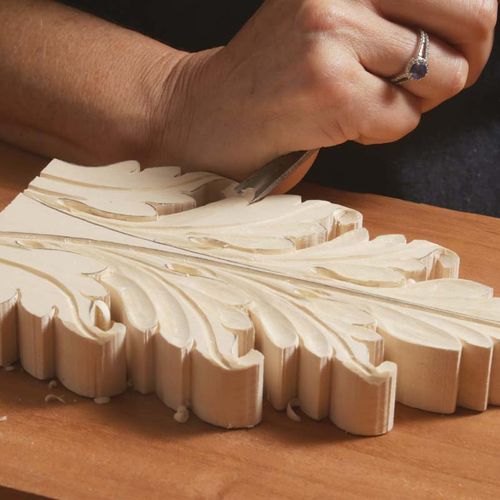
Hole the lobes. The #8–10mm gouge’s sweep creates good dimension within the lobes. Decrease the center of the lobes in a number of passes if obligatory to take care of a clear, crisp floor. The lobes’ sharp, raised edges ought to comply with the curve of the leaf and gently move towards the bottom of the leaf together with all different traces.
Be aware of grain path. Don’t hesitate to show the gouge round to chop in the other way if the grain dictates it. You can too take rolling, slicing cuts for an improved floor, and to guard edges from breaking.
Carve the ultimate veins
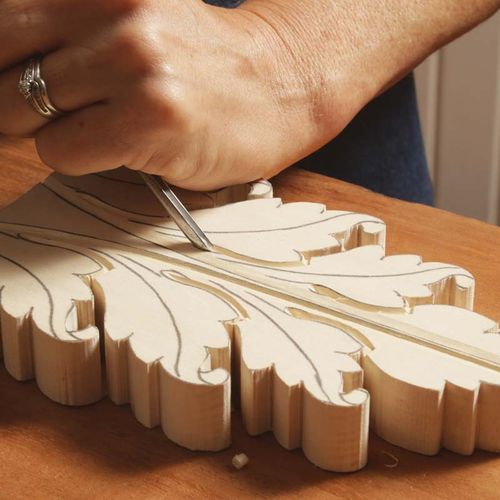
Create the veins in every lobe. Use a #11–2mm and ensure the veins curve gently down the leaf and fade off with out overlapping.
A V-tool types the central V. This swooping inverted V, lower on the center vein, breaks up the in any other case giant, flat central space.
Around the leaves, wrinkle the pipes
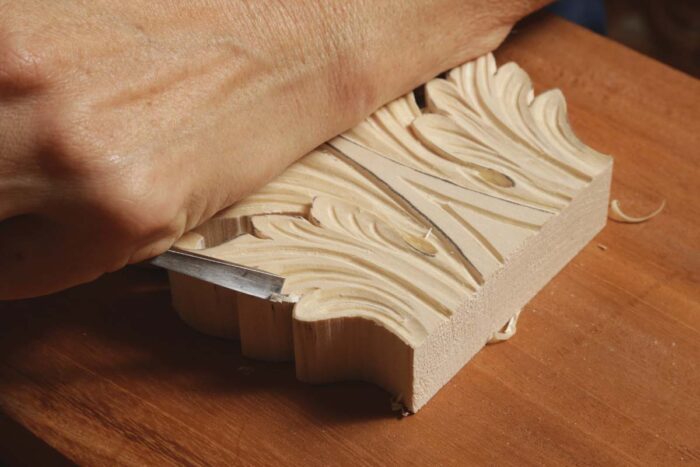
Soften the leaves. Utilizing a #3–6mm, which is a reasonably flat gouge, around the outer edges of the leaves in order that they appear to be they’re folding away. Additionally barely spherical the sides the place they overlap the decrease lobes.
Use thumbnail cuts under every eye. Use a #7– 6mm to chop a pair of wrinkles below every eye utilizing the two-step thumbnail lower. These ought to get barely smaller as they go down the pipe.
A bit on the acanthus leaf
The primary bodily proof of the acanthus leaf in structure exhibits up in Greece across the fifth century BC, particularly within the sharply pointed leaves of Corinthian capitals. From then on, the acanthus leaf clearly weaves by the artwork of numerous historic artwork durations, typically almost disappearing, however at all times re-emerging as a distinguished design ingredient. The Roman Empire eagerly embraced all the sooner Greek ornamental arts, and it produced a richer, extra versatile acanthus leaf with a extra naturalistic really feel. Overlapping lobes and sharply outlined ripples within the leaf introduced new boldness and life. The Byzantine Empire altered the design again to the sharply angled Greek type, preferring symbolism over the extra real looking Roman designs. This robust custom lasted for greater than 1,000 years. Finally the Romanesque, Norman, and Gothic durations rendered the leaf as extremely stylized and barely recognizable for a number of hundred years.
Nevertheless, I’m assured it is going to come again. In spite of everything, acanthus leaves adorn newly made tapestries, architectural particulars, and furnishings, even when this stuff are designed in a conventional vein. It simply goes to point out that this outstanding leaf has impressed us for 1000’s of years, and it’s displaying no signal of withering away. |
-Mary Might teaches carving at marymaycarving.com.
Instruments used:
Pfeil “Swiss Made” V-Parting Software #12 Sweep – 6mm
•6mm #12 sweep v-parting software
•Sq. tang deal with
•Octagonal hardwood deal with
•Alloy chrome-vanadium metal
Value: $43.92 on the time of writing
Pfeil “Swiss Made” Gouge #3 Sweep – 14mm
•Electronically hardened alloy chrome-vanadium metal blade
•European hardwood octagonal sq. tang deal with
•14mm #3 sweep gouge
Value: $40.10 on the time of writing
Pfeil “Swiss Made” Gouge #3 Sweep – 5mm
*Different to the #3 – 6mm which is briefly unavailable
•Electronically hardened alloy chrome-vanadium metal blade
•European hardwood octagonal sq. tang deal with
Value: $37.23 on the time of writing
Pfeil “Swiss Made” Gouge #7 Sweep – 6mm
Value: $38.18 on the time of writing
Pfeil “Swiss Made” Gouge #8 Sweep – 10mm
•Electronically hardened alloy chrome-vanadium metal blade
•European hardwood octagonal sq. tang deal with
Value: $42.01 on the time of writing
Pfeil “Swiss Made” Veiner #11 Sweep – 3mm
•Sq. tang deal with
•Octagonal hardwood deal with
•Alloy chrome-vanadium metal
Value: $42.96 on the time of writing
Join eletters as we speak and get the most recent strategies and how-to from Superb Woodworking, plus particular provides.
Obtain FREE PDF
whenever you enter your e-mail deal with under.